Blogs
January 8, 2025
How to create best-quality 3D scans of your environment with Teleport
In this article, we’ll cover the most important things for creating an optimal scan.
Sebastian Grigore

In this article, we’ll cover the most important things for creating an optimal scan.

Reconstruction relies on a concept called parallax: many overlapping frames taken from different positions.
Think of walking past a fence; the posts seem to move faster than the trees behind them. This shift gives Teleport the depth information it needs. If the camera stays in one spot and only turns, that effect is small and the 3D result will be weaker.
The goal is to collect clear, overlapping frames from varied viewpoints while keeping motion smooth and controlled.
Use this flow for most scenes. It balances quality with efficiency, especially with the 0.5x lens.
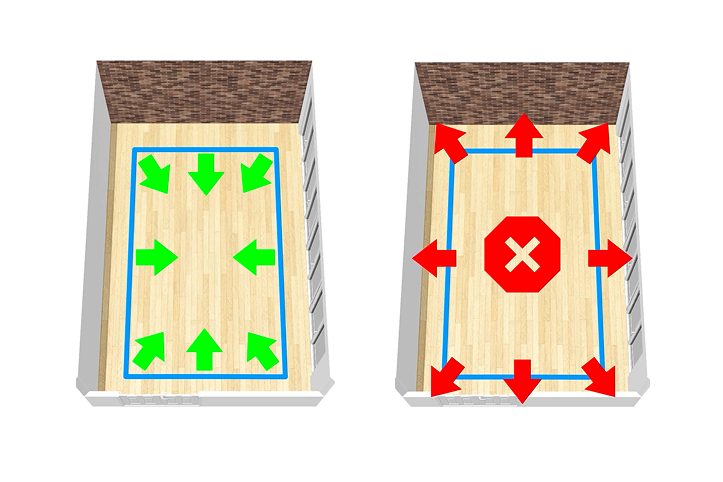
Walk a smooth loop around the edges of the space at chest to shoulder height. Keep the camera pointed toward the center of the space as you move around (outside-in capturing). The idea is to walk the perimeter of the space while filming what’s inside so that the floor and walls stay in frame.
Reserve inside‑out capturing or tight orbits for close‑up detail passes later. Corners, doorways and fixed background features can act as anchors, so keep them visible. Multiple loops at different heights can be utilized if applicable.
When capturing multiple areas in one scan, move through doorways, hallways and transitions while keeping lateral motion. Capture both sides of the doorway with overlapping views so the capture has enough shared detail to connect the spaces accurately.
Keep capturing as you step closer to objects / detailed areas. Do short loops around important objects or zones. Keep some background in frame for tracking. Avoid getting closer than 30 cm / 12 in unless it’s a small object with fine detail & distinct features. If the object fills the frame against an empty background, the algorithm has less to lock onto.
Add a lower and/or higher loop if tall objects, shelves, ceilings or stairs need it. The older rule of three fixed loops is not necessarily required with the 0.5x lens. Use extra passes primarily when they add coverage rather than repeating the same view.
In most cases, 250–1000 frames works well. Large or very detailed spaces can go up to 2000. More frames are not always better. Favor coverage and clean motion over repetition.
For additional examples and explanation of capture path shapes and spacing, read ‘Capture Paths’ in the Help Center.
Start your first capture today and see your space come to life in 3D! Install the 'Teleport by Varjo' app on your iPhone. If you don’t have an iPhone, you can still use Teleport by uploading photo or video from other cameras at teleport.varjo.com/upload/.

.avif)